Your smartphone goes everywhere with you. From kitchen counters and office desks to public transit and the depths of your pockets, it constantly collects oil, dust, lint, and bacteria. In fact, studies show that the average smartphone screen carries more germs than a public toilet seat.
However, when it comes time to clean it, reaching for the nearest bottle of glass cleaner or using a paper towel can easily destroy your device. Modern smartphones are highly engineered pieces of technology with specialized coatings on the glass and delicate gold pins inside the connection ports. One wrong move can permanently scratch your screen or ruin your ability to charge the phone.
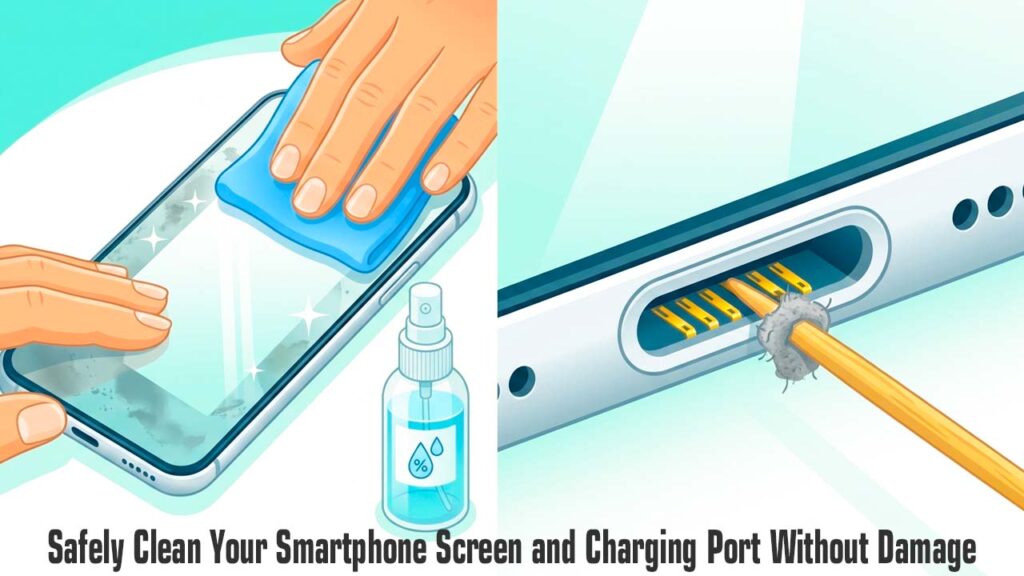
Here is a comprehensive, step-by-step guide to safely disinfecting your screen and clearing out a packed charging port without causing a dime of damage.
What NOT to Use: The Danger Zone
Before diving into the cleaning process, it is critical to know what materials will harm your phone. Avoid these common household culprits at all costs:
- Window Cleaners and Bleach: Traditional glass cleaners (like Windex) and harsh chemicals contain ammonia or bleach. These chemicals instantly strip away the oleophobic (oil-resistant) coating on your phone’s screen, making it a permanent magnet for fingerprints and smudges.
- Paper Towels and Tissues: While they feel soft to your hands, wood-based paper products are highly abrasive at a microscopic level. Wiping your screen with them can leave behind hundreds of tiny hairline scratches over time.
- Compressed Air (For Ports): It is incredibly tempting to blast your charging port with canned air. However, the intense pressure can actually push lint and debris deeper into the phone’s hardware, or worse, rupture the delicate internal microphone and speaker membranes located right next to the port.
- Metal Objects: Never use safety pins, paperclips, or sewing needles to dig dirt out of your charging port. Metal will scratch the delicate electronic contacts, causing a short circuit that can permanently kill your phone’s charging capabilities.
Part 1: How to Safely Clean and Disinfect the Screen
To give your screen a pristine, smudge-free finish without ruining the glass coatings, follow this safe method.
Step 1: Power Down Your Device
Before applying any liquid or wiping the surface, turn your smartphone completely off and unplug any charging cables. This prevents accidental screen taps and reduces the risk of electrical damage if moisture accidentally slips into an opening.
Step 2: Use a Dry Microfiber Cloth
The absolute best tool for cleaning a smartphone is a high-quality, clean microfiber cloth (the kind used to clean eyeglasses or camera lenses). Microfiber is specifically woven to trap dust, oils, and grease rather than just moving them around the glass.
- Wipe the screen gently in circular motions.
- Avoid pressing down hard, as trapped pieces of hard grit can act like sandpaper if pressed firmly into the glass.
Step 3: Use a Safe Liquid Solution (If Needed)
If a dry cloth isn’t cutting through dried-on grime, you need to use a safe moisture barrier.
- The Safe Solution: Mix a 1:1 ratio of distilled water and 70% isopropyl alcohol. Alternatively, use a specialized electronic screen cleaning spray.
- The Golden Rule: Never spray liquid directly onto your phone. Capillary action can draw the liquid into the seams of the screen, ruining the display panel. Instead, lightly mist the microfiber cloth so it is damp, not dripping wet, and gently wipe the screen down. Immediately follow up with a dry section of the cloth to buff away any remaining streaks.
Part 2: How to Clean the Charging Port Safely
If your charging cable keeps falling out of your phone, or if you have to wiggle the cord perfectly to get it to juice up, your charging port is likely choked with pocket lint and debris. Every time you push your charging cable into the slot, you compress the lint into a hard, dense cake at the very back of the port, blocking the electrical pins from making contact.
Here is how to extract that debris safely:
Step 1: Gather Your Safe Tools
Since metal is strictly off-limits, your absolute best tool is a wooden or plastic toothpick. If a standard toothpick feels too thick to fit comfortably into the slim slot of a USB-C or Apple Lightning port, you can use a pair of scissors to carefully shave the tip of the toothpick into a thinner, flatter wedge shape.
Step 2: Work Under Good Lighting
Do not attempt this in the dark. Sit directly under a bright desk lamp or use a second phone’s flashlight to look directly down inside the port. You want to see exactly where the debris is located before you begin.
Step 3: Gently Scrape and Hook
Insert your modified toothpick into the slot until it hits the back wall of the port.
- Using a light hand, sweep the toothpick across the floor of the port in a hooking motion to loosen the packed lint.
- Gently pull the toothpick outward against the side walls to drag the debris out.
- Be incredibly careful around the center tongue of a USB-C port or the side pins of a Lightning port. Focus your scraping purely on the back wall and corners where lint accumulates.
You will likely be shocked by the massive, tightly packed fuzzballs that slide out of such a tiny opening. Repeat this process patiently until you can see the bright, clean metal contacts at the back of the port.
Summary Maintenance Checklist
| Phone Component | Safe Cleaning Tool | What to Absolutely Avoid | Ideal Cleaning Frequency |
|---|---|---|---|
| Glass Screen | Dry or lightly damp microfiber cloth | Windex, paper towels, heavy pressure | Every 2 to 3 days |
| Charging Port | Wood/plastic toothpick, bright lighting | Safety pins, needles, compressed air | Every 3 to 6 months (or when loose) |
| Camera Lens | Clean microfiber cloth | Shirt sleeves, rough tissue paper | Before taking photos |
| Phone Case | Warm soapy water (remove phone first) | Harsh chemical bleach or abrasive pads | Once a month |
By breaking away from harsh household chemicals and aggressive scraping tools, you can easily keep your phone looking brand new and working perfectly. Investing just a few minutes into proper, gentle maintenance will protect your display’s integrity and save you from an expensive trip to a repair technician.